Electric Fence Maintenance & Troubleshooting Guide
📍 📖 Livestock Fencing Hub
Home/Livestock Fencing/Electric Fence Maintenance & Troubleshooting Guide: Fix Low Voltage Fast
Electric Fence Maintenance & Troubleshooting Guide
Overview
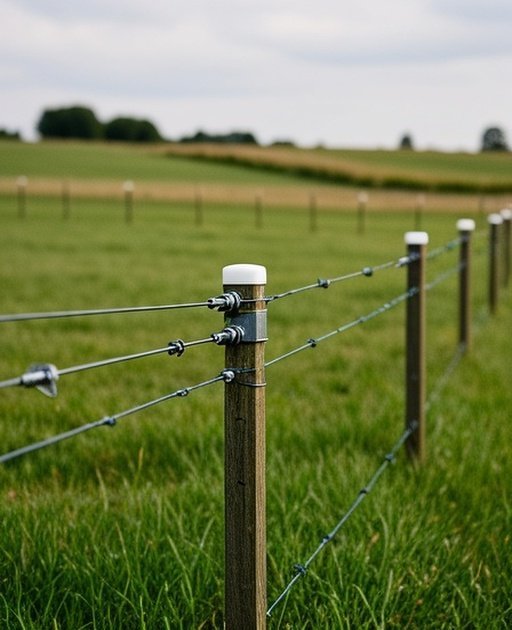
Even a properly installed electric fence can fail over time without regular inspection and maintenance. Vegetation growth, poor grounding, damaged insulators, lightning strikes, and undersized energizers are among the most common causes of voltage loss.
YouTube search queries: “electric fence troubleshooting low voltage fix tutorial” or “how to test and maintain electric fence system”
What This Guide Covers
How to Test Electric Fence Voltage
Testing voltage is the first step in any electric fence troubleshooting process. Use a digital voltmeter or dedicated fence tester — neon bulb testers only confirm voltage presence, not its level. Place one probe on the fence wire and the other in the soil at least 6 inches deep. Readings above 3,000 volts are adequate for cattle; 4,000–5,000 volts for sheep and goats. Test at three points: near the energizer, midway, and at the far end.
A voltage drop of more than 500 volts between test points indicates a short, poor connection, or grounding problem in that fence section. Walk the fence between the high-voltage and low-voltage test points looking for vegetation contact, broken insulators, wire touching metal posts, or damaged wire. Most voltage problems trace to one of these four causes.
Finding and Fixing Fence Shorts
Fence shorts are the most common cause of low voltage and failed containment. A short occurs when the energized fence wire contacts a grounded object — vegetation, a metal post, the soil, or a broken insulator. Disconnect sections of fence at gates or connection points and test each isolated section. The section that shows normal voltage when isolated contains the short; the section with unchanged low voltage is clear.
Vegetation shorts are temporary but drain significant energizer output. Run a string trimmer or spray herbicide along the fence line to create a 12-inch bare zone. Persistent shorts after vegetation management indicate a physical problem — walk the fence slowly looking for wire contacting T-post stems, wire touching another wire at a corner, or wire draped over a fence brace.
Annual Fence Maintenance Checklist
Each spring before turning livestock into pastures: walk the entire perimeter checking post stability, inspect all insulators for cracking or UV degradation, re-tension wire that has stretched over winter, test voltage at multiple points, verify energizer output is within specifications, and check ground rod connections for corrosion or looseness. Record voltage readings at key test points and compare to previous years.
Check energizer settings after winter — some have seasonal output adjustments. Clean the energizer housing of debris and insects. Inspect the lead-out wire from energizer to fence for damage. Replace corroded ground rod clamps. A steady decline in voltage at the far end of the fence over multiple seasons indicates increasing resistance somewhere in the system that warrants investigation.
Energizer Not Working: Diagnosis Steps
When an energizer fails to produce output, work through a sequence: check the power supply first (AC outlet functioning, fuse intact, solar battery charged). Then disconnect all fence wires and test voltage directly at the fence terminal — if voltage is present here but not on the fence, the problem is in the fence, not the energizer. If no voltage at the terminal with all fence disconnected, the energizer itself has failed.
Lightning is the most common cause of sudden energizer failure. External lightning diverters installed on the fence line before the energizer significantly reduce strike damage. Keep the model number and purchase date of your energizer recorded — most manufacturers offer repair service or replacement programs within the warranty period. A repair often costs 30–50% of replacement price for units less than 5 years old.
Ground System Troubleshooting
An inadequate ground system causes symptoms identical to low energizer output — low voltage readings, animals not respecting the fence — but the energizer is functioning normally. Test the ground system separately: attach a voltmeter between a fence wire and a ground rod driven at least 50 feet from the energizer ground rods. Readings above 200 volts indicate insufficient grounding that requires additional ground rods.
Adding additional ground rods solves most grounding problems. Drive rods 6 feet deep, spaced 10 feet apart, in moist soil. In chronically dry or sandy soils, install a dedicated ground return wire where every third fence wire is connected to ground — this configuration completes the circuit through the fence rather than through soil, working effectively where soil conductivity is too low for conventional grounding.
How to Test Electric Fence Voltage
Testing electric fence voltage using digital fence testers is the foundation of proper maintenance.
Low voltage across the entire fence typically indicates an energizer problem or grounding problem rather than a fence short. Test voltage at the energizer terminals directly — if this reading is also low, the energizer is underperforming and may need service or replacement. If terminal voltage is normal but fence voltage is low, a ground system problem is preventing the circuit from completing effectively.
For energizer problems, check the settings, confirm power supply, and test with a known-good replacement energizer if available. Most energizer manufacturers provide repair service; a 5-year-old energizer with declining output often benefits from factory service at a fraction of replacement cost.
If one section is consistently low voltage
Consistently low voltage in one section while other sections test normal indicates a short or high resistance connection in that specific section. Isolate the section by disconnecting at gate handles on both ends and test — if voltage returns to normal when isolated, the section is shorting to ground when connected. Walk the section carefully looking for vegetation, broken insulators, or wire-to-post contact.
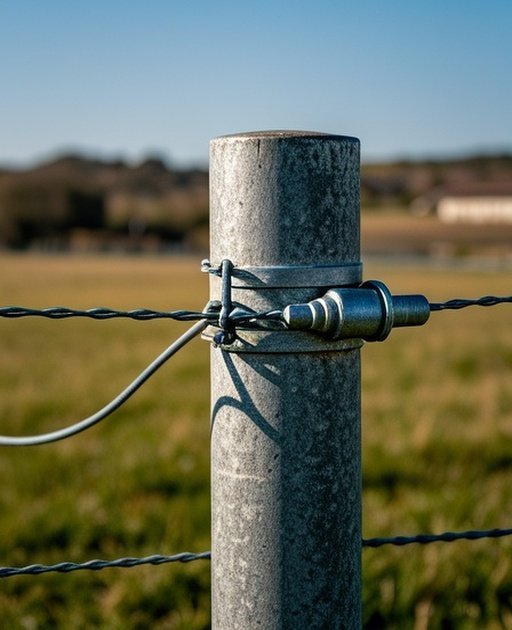
Splices and connections are common high-resistance points. Each splice using improper or corroded connectors adds resistance that reduces voltage. Replace any splices with proper in-line fence connectors and ensure all connections are tight and corrosion-free. Use all-galvanized or purpose-made fence connectors — copper connectors used with galvanized wire corrode rapidly.
If Fence Voltage Suddenly Drops
When voltage suddenly drops, check the grounding system and vegetation contact first—these account for 70–80% of sudden voltage loss.
Loose or sagging wires reduce voltage transfer efficiency and allow animals to push through or step over. Maintain proper tension in high-tensile systems (200–250 pounds) and appropriate spacing between wires for target species.
Regular inspection identifies tension loss before it becomes critical. Wires showing significant corrosion or damage should be replaced—compromised conductivity reduces shock effectiveness across entire fence sections.
Safety Factors
Electric fences operate on pulsed high-voltage systems designed to deter, not injure, when properly maintained. Regular inspection prevents accidental exposure to damaged wiring, ensures output remains within safe parameters, and verifies warning signage remains visible.
Follow safety standards for installations near public access areas and residential boundaries. Proper maintenance protects both livestock and humans from electrical hazards.
Cost & Maintenance
Regular vegetation trimming and insulator replacement are inexpensive compared to livestock loss or complete system failure. Preventive maintenance costs typically range from $50–$200 annually for routine inspections and minor repairs.
Compare this to replacement costs for escaped livestock, predator losses, or complete system rebuilds ($500–$2,000+). For maintenance budgeting, see the Fence Cost & Budgeting guide.
Installation Complexity
Maintenance difficulty depends on system layout and design. Permanent high-tensile systems require periodic tension monitoring but infrequent adjustments. Temporary systems need more frequent voltage checks and adjustment.
Well-designed systems with proper grounding and minimal vegetation contact reduce maintenance burden significantly. For maintenance planning during design, see the Fence Planning Basics guide.
Legal & Boundary Considerations
Ensure electric fences meet local safety regulations, especially near public access areas, recreational trails, or residential boundaries. Some jurisdictions require specific warning signage, voltage limitations, or periodic safety inspections.
Maintain documentation of maintenance activities and safety compliance for liability protection. Regular inspections demonstrate due diligence in fence operation and livestock management.
Weekly testing is recommended during active grazing seasons, especially during peak vegetation growth periods when shorts are most likely to develop.
How many volts are required for sheep?
Sheep typically require 4,000–5,000 volts due to wool insulation that reduces shock effectiveness—higher voltage ensures adequate correction through fleece.
Vegetation contact with wires is the leading cause of voltage loss—regular mowing or trimming beneath fence lines prevents most common performance problems.
Final Recommendations
Electric fence maintenance is not optional—it is essential for system reliability and livestock security. Most fence failures result from grounding issues, vegetation shorts, or neglected inspections that allow minor problems to escalate.
Establish a regular inspection routine including weekly voltage testing during active seasons, monthly insulator and post inspection, seasonal vegetation control, and annual comprehensive system evaluation. Address minor issues immediately before they compromise entire fence sections.
Proper maintenance protects livestock, reduces long-term repair costs through preventive intervention, and ensures consistent fence performance. Use the linked guides above to develop maintenance schedules, learn diagnostic techniques, understand grounding requirements, and implement protection systems for optimal electric fence reliability.
Electric Fence Safety & Voltage Guide Overview Electric fence safety and voltage management are critical for livestock containment, predator deterrence, and human protection. An electric…
Sheep Fencing Guide Overview Sheep fencing is designed to contain sheep safely while protecting them from predators and preventing escape. Because sheep are agile, curious,…
Temporary & Portable Electric Fencing Guide Overview Temporary and portable electric fencing systems are designed for rotational grazing, seasonal paddocks, strip grazing, and short-term livestock…
Explore More Fencing Guides
Find the right fence for your farm — browse by livestock type, material, or project need.