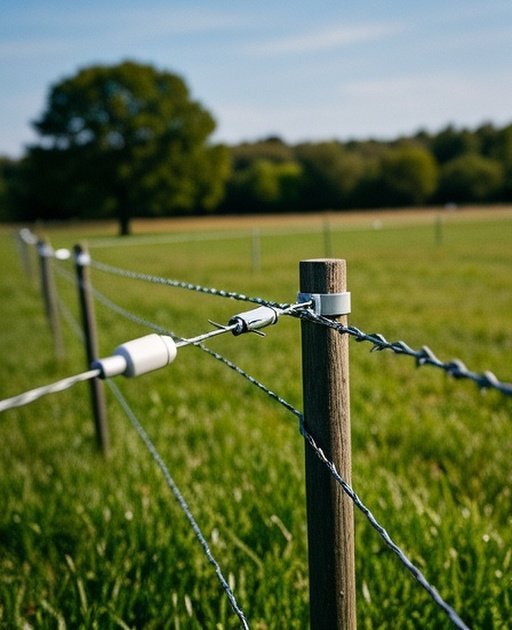
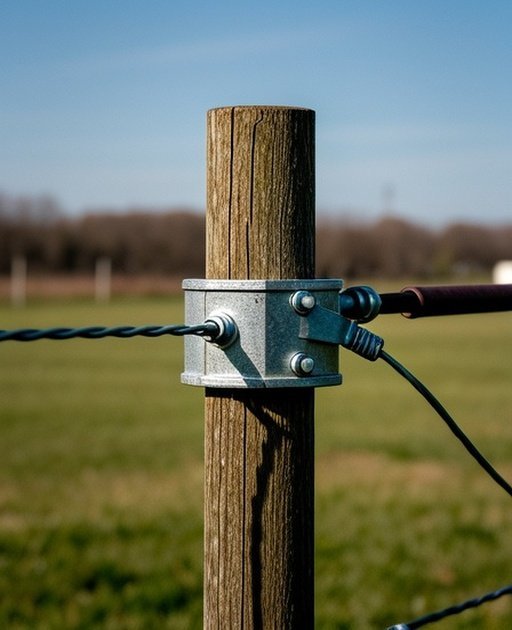
Electric fencing is one of the most efficient and cost-effective livestock containment systems when properly installed. However, performance depends heavily on correct wire spacing, grounding systems, energizer sizing, post selection, and vegetation control.
YouTube search queries: “how to install electric fence for livestock step by step” or “electric fence installation tutorial cattle sheep”
What This Guide Covers
Electric Fence Layout Planning
Effective electric fence installation starts with a site map showing existing structures, water sources, terrain features, and planned paddock divisions. Mark the energizer location first — it should be inside a building or covered enclosure, within reach of the fence line, and accessible to power (AC outlet for mains-powered or open sky for solar). The energizer location determines where the main fence lead connects and where the ground rod system is installed.
Run perimeter fencing first, then add interior cross-fencing for paddock division. The main fence perimeter serves as the backbone; interior cross-fencing connects to it using gate handles or T-posts with insulators. Plan gate locations to allow tractor and equipment access (12–16 foot openings minimum) and pedestrian access (4-foot gates). Sketch the layout on paper before driving any posts — changes are free at the planning stage.
Wire Spacing by Livestock Type
Wire strand placement varies significantly by livestock species. For beef cattle: strands at 14, 28, and 44 inches for a 3-strand configuration, or add a strand at 8 inches near the ground for calves. For horses: high-visibility tape at 24 and 48 inches (or board fence with single electric offset at chest height). For sheep: strands at 6, 14, 24, and 34 inches to contain both lambs and ewes effectively. For goats: strands at 8, 16, 26, and 38 inches plus electric inside any physical fence.
Bottom strand height is the most critical specification — too high and calves, lambs, or small animals go under the fence. The bottom strand should be 8–10 inches from the ground for cattle, 6 inches for sheep, 8 inches for goats. In snow country, raise the bottom strand to 12–14 inches to prevent snow from shorting the fence in winter, and add a lower strand during snow-free months if containment of young stock is needed.
Grounding System Installation
Proper grounding is the single most important and most misunderstood aspect of electric fence installation. An electric fence operates by completing a circuit through the animal, the ground, the ground rods, and back to the energizer. Poor grounding means incomplete circuits, weak shocks, and failed containment — even with a powerful energizer. The grounding system must be installed with as much care as the fence itself.
Minimum grounding specification: 3 ground rods of 6-foot galvanized steel spaced 10 feet apart, connected in series to the energizer ground terminal with 12.5-gauge insulated wire. In dry, sandy, or frozen soils, increase to 6–8 ground rods. All connections must be tight using purpose-built ground rod clamps — loose connections cause resistance that reduces effectiveness. Test ground system function by placing a voltmeter between a fence wire and a separate ground rod driven at least 50 feet from the existing ground system. Readings above 200 volts indicate inadequate grounding.
Choosing the Right Energizer
Match energizer output to fence length and livestock type, always oversizing by 1.5–2x the minimum recommendation. For a 1-mile fence containing trained beef cattle: minimum 1 joule, recommended 2 joules. For the same fence containing sheep or goats: minimum 2 joules, recommended 3–4 joules. For a 3-mile perimeter with mixed livestock: minimum 5 joules commercial-grade energizer.
Low-impedance energizers are universally superior to standard-impedance units for livestock applications. Low-impedance design maintains effective voltage even when fence resistance increases from vegetation contact, wet conditions, or small shorts. The modest cost premium (typically $20–$50) for low-impedance over standard is worthwhile for any installation where consistent containment matters. Most commercial fence energizers sold today are low-impedance by default.
High-Tensile Electric Fence Setup
High-tensile electric fence uses 12.5-gauge smooth wire at high tension (150–200 pounds) run between anchor posts at each end and at every change in direction, with in-line strainers maintaining consistent tension across the wire run. Between anchor posts, T-posts at 30-foot intervals (or wooden posts at 60-foot intervals) support the wire height without serving as tensioning points. This long-span setup dramatically reduces post requirements versus conventional wire.
Insulate at every post contact point — T-posts use clip-on or wrap-around insulators, wooden posts use screw-in or nail-in insulators. Use quality UV-stabilized plastic insulators; cheap white plastic insulators crack after 2–3 years of sun exposure and create fence shorts. Check all insulators annually and replace any showing cracking or yellowing. Faulty insulators are a leading cause of chronic low-voltage problems on aging electric fence systems.
Electric Fence Layout Planning
Electric fence layout planning requires strategic decisions about perimeter versus subdivision fencing, wire routing to
The lowest-cost effective electric fence is a 2-strand configuration using high-tensile wire on step-in posts at 30-foot spacing, connected to a 1-joule solar energizer. This setup can be installed for $0.50–$1.00 per linear foot in materials for cattle applications. The step-in post system moves easily for rotational grazing, and the entire perimeter for a 5-acre paddock can be configured in a few hours.
Cost increases significantly for permanent systems requiring wooden anchor posts, concrete, and in-line strainers. For permanent electric fence, budget $1.50–$2.50 per linear foot installed on flat terrain with wooden posts at 150-foot intervals and T-posts between. This remains 40–60% cheaper than barbed wire or woven wire of similar length.
If You Want Minimal Maintenance
For lowest ongoing maintenance on electric fence, invest upfront in quality components: galvanized T-posts (not painted, which rust through the zinc coating), quality UV-stabilized insulators, a commercial-grade low-impedance energizer with lightning diverter, and a proper ground system with 4+ ground rods. These components require inspection but rarely need replacement for 10–15 years.
Vegetation management is the primary ongoing task — trim or spray vegetation under and around the fence 2–4 times per season. Install the fence so the lowest wire clears the normal grass height by 2–4 inches, reducing but not eliminating vegetation contact. Some operators use a strip of gravel or bare soil under the fence line to minimize vegetation growth at the base.
If You Need Low-Cost Fencing
Electric multi-strand systems significantly reduce material costs compared to woven wire, wood board fencing, or barbed
Fence height and strand spacing depend on livestock type and training level. Cattle often require 2–4 strands reaching 40–48 inches total height, while sheep may require 5–7 closely spaced strands (6–10 inch intervals) reaching 40–45 inches to prevent slipping through gaps.
Proper spacing ensures animals respect the fence without needing continuous physical barriers. Bottom wire height is critical—typically 8–12 inches above ground for cattle and 6–8 inches for smaller livestock. Closer spacing near ground level prevents young animals from crawling under.
Safety Factors
Modern electric fences deliver high-voltage (5,000–10,000 volts), low-amperage pulses designed to deter rather than injure. The brief pulse duration (typically 0.0003 seconds) creates memorable correction without causing serious harm to animals or humans.
Proper grounding and insulation are critical for safety compliance. Install warning signage at access points, use insulated lead-out cables from energizers, and ensure all connections meet manufacturer specifications. For safety standards and regulations, see the Energizer Guide.
Cost & Maintenance
Electric fencing has lower material cost than woven wire—typically $1–$4 per linear foot installed compared to $3–$8 for mesh systems. However, it requires ongoing vegetation management to prevent short circuits that drain voltage and allow livestock escapes.
Annual costs include vegetation control (mowing, herbicides, or grazing management), periodic voltage testing, occasional wire and insulator replacement, and energizer maintenance or battery replacement. For comprehensive cost planning, see the Fence Cost & Budgeting guide.
Installation Complexity
Permanent high-tensile systems require tensioners, insulators, strong corner braces, and proper <ahref=”/electric-fence-grounding-system-guide/”>grounding installation. The technical demands exceed simple wire stapling but create superior long-term performance.
Temporary systems are easier to install—step-in posts and portable conductors require minimal tools and skills—but need frequent monitoring and adjustment. For installation guidance, see the Fence Planning Basics guide.
Legal & Boundary Considerations
Electric fences near public roads, residential areas, or recreational trails may have regulatory requirements including warning signage, voltage limitations, or minimum setback distances. Some jurisdictions restrict electric fencing in certainzones due to safety concerns.
Shared boundary fences may require neighbor notification or agreement, particularly when electrifying existing non-electric fences. Always verify local ordinances and property boundaries before installation. For legal planning guidance, see the Local Fence Laws & Regulations guide.
Typically 2–4 strands provide adequate containment for cattle depending on animal temperament, training level, and whether the fence is perimeter or subdivision.
How deep should electric fence posts be?
Posts should be set 2–3 feet deep for permanent systems, with corner and end posts going 3–4 feet deep to withstand tension loads—deeper in loose or sandy soils.
No—grounding is essential for proper voltage return and shock delivery. Without adequate grounding, the electrical circuit cannot complete and animals won’t receive effective correction.
How often should voltage be tested?
Voltage should be tested weekly during active use and immediately after storms to ensure adequate shock delivery and identify shorts before animals discover weak sections.
Final Recommendations
Electric fence installation must be approached as a complete system—not just wire and an energizer. Proper layout planning, correct wire spacing, sufficient grounding, and appropriate energizer sizing determine long-term effectiveness and livestock containment reliability.
For permanent perimeter fencing, consider high-tensile multi-strand systems that provide 20+ years of service with minimal maintenance. For rotational grazing and flexible livestock management, portable electric fencing offers installation flexibility and cost efficiency.
Always pair installation strategy with proper voltage monitoring and maintenance planning to ensure reliable containment. Use the linked guides above to evaluate costs, compare system types, learn bracing techniques, and troubleshoot performance issues for optimal electric fence performance.
Electric Fence Safety & Voltage Guide Overview Electric fence safety and voltage management are critical for livestock containment, predator deterrence, and human protection. An electric…
Temporary & Portable Electric Fencing Guide Overview Temporary and portable electric fencing systems are designed for rotational grazing, seasonal paddocks, strip grazing, and short-term livestock…
Sheep Fencing Guide Overview Sheep fencing is designed to contain sheep safely while protecting them from predators and preventing escape. Because sheep are agile, curious,…
Explore More Fencing Guides
Find the right fence for your farm — browse by livestock type, material, or project need.