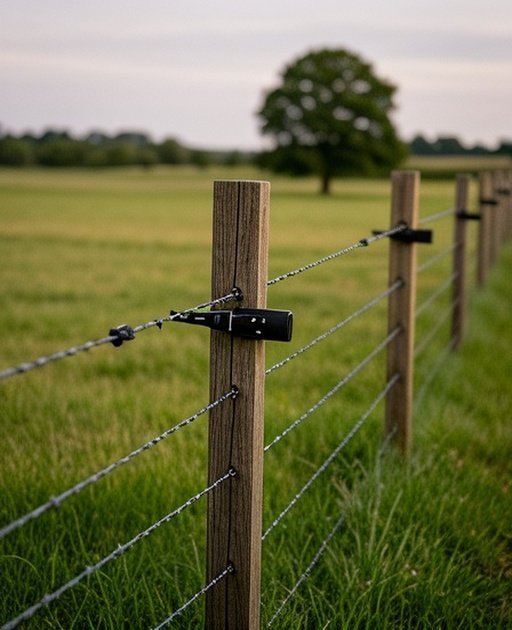
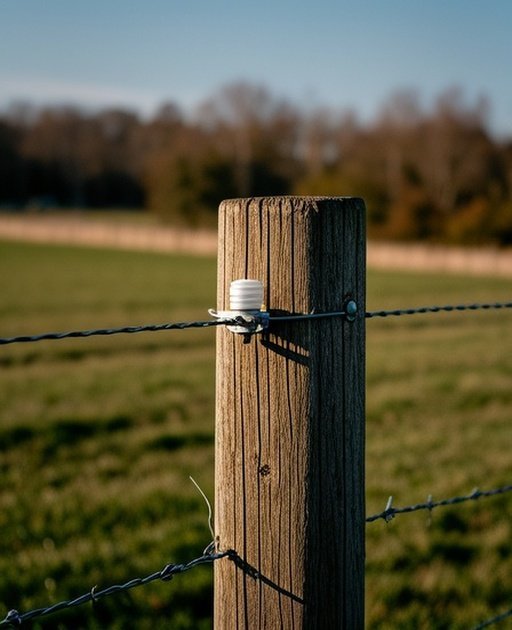
Fence post installation determines overall fence system stability, longevity, and structural performance—proper post setting techniques prevent leaning, sagging, and premature failure that compromise livestock containment for cattle, horses, sheep, and goats. Critical factors include appropriate depth standards, soil-specific techniques, correct material selection, and proper alignment maintaining straight fence lines under tension stress from barbed wire, woven wire, or electric systems.
This guide explains post depth calculations, concrete versus gravel setting methods, spacing requirements, corner bracing techniques, and installation sequences for wooden posts and steel T-posts. It is designed for DIY landowners, small farm operators, and ranchers installing livestock fencing themselves, focusing on proven techniques suitable for typical farm-scale projects rather than specialized commercial applications. Content addresses common installation challenges including frost heave prevention, rocky ground solutions, and slope adjustments.
This page does not cover commercial-grade pile driving, highway barrier systems, or construction-grade structural foundations. For comprehensive property layout planning before post installation, review the Fence Planning Basics Guide.
YouTube search query: “how to set fence posts correctly step by step rural fencing”
What This Guide Covers
How Deep Should Fence Posts Be Set?
Fence post depth is determined by the rule of thirds: one-third of the total post length below ground, two-thirds above. A 7-foot post should be set 28 inches deep minimum. Corner posts and end posts bear the full tension of the fence line and require deeper setting — 36 inches for 8-foot posts is the standard for corner posts in normal soil. In loose, sandy, or wet soils, increase depth by 6–12 inches and consider concrete backfill.
Frost line depth determines minimum post depth in cold climates. Posts set shallower than the local frost line will heave as soil freezes and thaws, creating fence sagging and alignment problems each spring. USDA frost depth maps show local frost lines ranging from 0 inches in warm climates to 60+ inches in northern states. Set posts below the frost line whenever the fence is permanent and alignment matters.
Corner Post and Brace System Installation
Corner posts carry the full tension load of attached fence lines — they must be set deeper and in heavier material than line posts. Standard corner post is a 6-inch diameter round timber or 4x6 square timber, 8 feet long, set 36 inches deep with concrete backfill. The post itself is only part of the corner system — it must be braced to resist being pulled inward by fence wire tension.
The H-brace system is the industry standard: a horizontal brace rail connecting the corner post to a second post 6–8 feet away, with a diagonal wire running from the top of the line post back to the base of the corner post. This diagonal wire prevents the corner post from leaning inward under fence tension. Build the H-brace with the same care as the corner post — a failed brace collapses the entire fence run attached to it.
T-Post Installation Techniques
Steel T-posts are the most common line posts for agricultural fencing, combining adequate strength with low cost and easy installation. Standard fence posts are 6 or 6.5 feet long; driven 18–24 inches deep, they stand 42–48 inches above grade — appropriate for most cattle and horse applications. The flat plate welded to the post near the bottom (the anchor plate) helps resist upward movement when the post is driven.
Drive T-posts with a post driver, not a hammer. A manual post driver (a heavy steel tube with a cap, slid over the post and lifted/dropped) is adequate for occasional use; a tractor-mounted hydraulic post driver is far more efficient for any fence run over 200 posts. Drive posts vertically — tilted posts create uneven wire height and reduce holding strength. Mark post spacing with a measuring tape laid along the fence line before driving to maintain consistent spacing.
Wooden Post Installation: Hand vs Machine
Wooden post installation by hand using a manual clamshell digger or powered auger is feasible for small quantities (up to 50 posts) and produces clean holes with minimal soil disturbance. For larger quantities, a tractor-mounted post auger (PTO-driven) drills holes significantly faster. A hydraulic or pneumatic post driver hammers posts directly without drilling — faster than augering but requires posts with pointed or chamfered ends and works best in loose to medium soils.
Rocky soil requires specialized equipment. Hydraulic rock posts with a chisel point can drive through fractured rock; jackhammer attachments work in solid ledge. In areas of extensive rock outcropping, consider driven steel star posts (pickets) that can be placed in thin soil between rocks, or surface-mounted post brackets anchored with masonry anchors into rock faces. Never try to force wooden posts into rocky ground with a standard driver — the post splits rather than penetrating.
Concrete vs No-Concrete for Post Setting
Concrete backfill is appropriate for corner posts, gate posts, and end posts where maximum holding strength is needed. For line posts in normal soil, compacted native soil backfill typically provides adequate holding strength at far lower cost — digging, mixing, and placing concrete adds significant labor and material cost per post. Standard line posts in fence construction don't use concrete.
When using concrete for structural posts, allow 48 hours of cure time before applying wire tension. Bracing or propping the post during cure prevents movement while the concrete sets. Concrete mix should be poured and tamped in layers around the post, crowned slightly above grade to shed water. Standing water around post bases is the primary cause of accelerated rot in wood posts — grade backfill to drain away from the post.
Determining Proper Fence Post Depth
Proper fence post depth follows the one-third rule—bury one-third of total post length underground providing structural
Rocky or hardpan soil that resists standard post drivers requires either hydraulic breaker attachments, drilling with a rotary hammer bit, or switching to anchor-style post systems. Surface-mounted post base plates anchored into rock with expansion anchors work for electric fence applications where posts don't need to resist lateral force. For permanent woven wire or barbed wire in rocky terrain, drilling holes and using concrete-set posts is often the only practical option.
In extreme rocky terrain, reduce post frequency by switching to high-tensile wire that can span 200+ feet between posts, locating posts in soil pockets between rock outcrops. This minimizes the number of problematic installations while maintaining fence integrity. Supplement sparse posts with additional tensioning hardware rather than forcing post placement in impossible locations.
If you're installing posts in wet or swampy areas
Wet or swampy areas require treated posts rated for ground contact in high-moisture conditions — UC4B or UC4C treatment rating for soil contact, or naturally rot-resistant species like black locust or osage orange. Standard UC3A treated posts will rot within 5–7 years in saturated soil. Set posts deeper than normal in soft wet soil to maintain stability as the soil compresses around the post over time.
Consider alternative post types in chronically wet areas. Steel pipe posts driven into wet soil resist rot entirely and maintain vertical stability better than wood in soft ground. In tidal or flood-prone areas, pressure-treated posts with helical screw anchors provide superior holding strength in saturated soil compared to conventionally driven or augered posts.
If Your Soil Is Soft or Sandy
Soft or sandy soils demand enhanced installation techniques including deeper post setting (30-50% beyond standard depths
Post selection and installation depth respond to fence height and load requirements—taller fences create greater leverage multiplying lateral forces, requiring deeper setting and larger diameter posts maintaining stability. Standard height recommendations by species create corresponding post demands—48-54 inch cattle fencing permits standard 8-foot posts, while 60-inch horse fencing benefits from 9-foot posts providing adequate underground depth. Wire tension loads vary dramatically—woven wire creates moderate tension, high-tensile systems generate 200-300 pounds per strand, and barbed wire runs 80-120 pounds per strand. Calculate cumulative wire loads determining corner post requirements—underestimating forces causes premature structural failure.
Post Diameter and Material Strength
Post diameter and material selection balance strength requirements with economics—treated wooden posts in 4-6 inch diameters suit standard line posts, 6-8 inch corners and braces, while steel T-posts (1.25-1.33 pound per foot) provide economical alternatives for light-duty applications. Wood species affect longevity—Southern Yellow Pine and Red Cedar offer superior rot resistance, Lodgepole Pine provides economy option. Steel pipe posts (2-4 inch diameter) deliver maximum strength for demanding installations but cost significantly more than alternatives. Material selection affects installation methods—wooden posts require augered holes and backfill, T-posts drive directly, pipe posts may need concrete footings. Consider long-term maintenance implications—premium materials reduce replacement frequency despite higher upfront costs.
Cost vs Long-Term Maintenance
Post installation represents 40-60% of total fence construction costs through material expenses and labor investment, but determines fence lifespan and maintenance requirements over decades. Proper installation using quality materials costs more initially but delivers 25-40 year performance versus 10-15 years from inadequate techniques or inferior posts. Ongoing maintenance costs correlate inversely with installation quality—well-set posts require minimal adjustment while poorly installed systems demand frequent repairs, re-tensioning, and premature replacement. Calculate total cost of ownership rather than minimizing initial expenses—$2,000 additional investment in proper installation saves $5,000-$10,000 in premature replacement costs over 20-year timelines.
Installation Complexity and Labor
Post installation complexity varies dramatically by method and conditions—DIY fence builders can install T-posts at 20-30 per day using manual drivers versus 8-12 augered wooden posts daily requiring digging, setting, and backfilling. Rocky terrain reduces productivity 50-70% through drilling requirements, while slopes create alignment challenges and safety concerns. Professional contractors install posts 2-4x faster than DIY operators but charge $3-$6 per post labor costs. Realistic time estimates prevent project delays—100 posts require 3-5 days DIY labor for experienced installers, 7-10 days for beginners. Factor installation complexity into planning—underestimating labor demands causes abandoned projects or rushed work compromising quality.
Fence posts should be set one-third of total post length underground—standard 8-foot posts require 30-36 inch depth, while taller posts and corner assemblies demand 36-48 inches providing structural stability against tension forces and livestock pressure. Frost line depth in cold climates may dictate deeper installation, and soil conditions affect requirements—sandy soils need greater depth than clay.
Is concrete necessary for fence posts?
Concrete proves necessary for corner posts, gate posts, and installations in sandy or soft soils requiring maximum stability, but most line posts in firm soil install successfully using tamped earth or gravel backfill providing adequate holding power at minimal cost. Clay soils and firm loam permit concrete-free installation for standard line posts. Concrete adds $3-$8 per post in materials plus curing time—use strategically for high-stress locations rather than entire fence lines.
How far apart should fence posts be spaced?
Post spacing standards depend on fence type and wire tension—barbed wire systems typically space 12-16 feet, woven wire requires 8-12 feet preventing sag, high-tensile systems permit 15-20 feet through superior tension, while board fencing demands 8-10 feet. Closer spacing increases costs but improves strength—balance economics with performance requirements.
What is the strongest type of fence post?
Steel pipe posts (2-4 inch diameter) provide maximum strength withstanding highest tension loads and livestock pressure, followed by large-diameter treated wooden posts (6-8 inches) offering excellent performance for corner and brace assemblies, while standard T-posts suit economical line post applications in light-duty fencing. Treated wood species like Red Cedar and pressure-treated Southern Yellow Pine balance strength with rot resistance. Post strength requirements depend on livestock type and fence system—match post capacity to application demands.
How long do properly installed fence posts last?
Properly installed pressure-treated wooden posts last 20-30+ years in ground contact depending on treatment quality and soil conditions, steel T-posts serve 20-40 years with galvanized coating preventing rust, and steel pipe posts deliver 30-50+ year performance in most environments. Untreated wood fails within 5-10 years through rot. Post longevity depends on proper installation depth, drainage, treatment quality, climate stress, and ongoing maintenance—poor installation reduces lifespan 30-50% through premature failures regardless of material quality.
Final Recommendations
Fence post installation represents the foundation determining overall fence system performance, longevity, and maintenance requirements over decades of service. Proper techniques including adequate depth, correct spacing, reinforced corner assemblies, and appropriate material selection create durable livestock containment serving 25-40 years versus 10-15 years from inadequate installation. Best for DIY builders and small-scale livestock landowners willing to invest time learning proper methods and using quality materials.
Not ideal for large commercial ranch operations requiring heavy equipment and professional crews, or highway-grade structural fencing beyond agricultural scope. Before beginning installation, review comprehensive fence planning basics determining post locations and quantities, evaluate budget requirements for materials and tools, and assess site-specific challenges affecting installation complexity. Invest in proper post installation preventing expensive failures—cutting corners on foundation work compromises entire fence system regardless of wire quality or design sophistication.
Sheep Fencing Guide Overview Sheep fencing is designed to contain sheep safely while protecting them from predators and preventing escape. Because sheep are agile, curious,…
Short Answer To set fence posts in rocky soil, use a combination of digging bars, smaller pilot holes, and compacted gravel backfill instead of relying…
Electric Fence Safety & Voltage Guide Overview Electric fence safety and voltage management are critical for livestock containment, predator deterrence, and human protection. An electric…
Explore More Fencing Guides
Find the right fence for your farm — browse by livestock type, material, or project need.